Cranberry-Walnut Pumpkin Loaves, Tuesdays with Dorie

Tags

, , , , ,

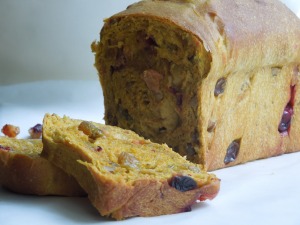
Cranberry-Walnut Pumpkin Loaves

This is NOT a quick bread. It’s a slow, slow, slow yeast bread. Snail paced. Around 18 hours total. It’s chockful of the flavors of fall like pumpkin, nutmeg, and cranberries.

Despite the long wait time I enjoyed making this. This recipe is perfect for the season. Smelled amazing. Tasted even better. I bought these cute little loaf pans and was pleased with everything about the end product.

You can find the recipe at this week’s host: This Bountiful Backyard.

The lengthy recipe time is due to several epic rising times. After the dough is formed it’s covered and set aside to rise at room temperature for two hours. Then you deflate the dough and refrigerate it overnight. In the morning you take the dough out and let it rise at room temperature for another four hours. Shaping the dough into loaves is next followed by another rise time of two hours. Last you bake the dough for 35 minutes at 350 degrees F.

Plan ahead and there’s nothing really that difficult about these cranberry-walnut pumpkin loaves. I think it’s perfect as is or smeared with a little apple butter for the complete fall package.

Boy have I been neglecting this blog lately. I have been baking up a storm but not blogging about it. My two oldest children both had their birthdays and parties. Then there’s soccer practice, school meetings, going to the pumpkin patch, etc. eating up all my free time. I hope things slow down around here soon so I can have some more time to bake. . .and blog!

Fall is busy but one of my favorite times of the year.

Whole Wheat Loaf—Tuesdays with Dorie

Tags

, , ,

Whole Wheat Loaf

This is not your cardboard grocery store version of whole wheat bread. Honey and a touch of molasses (substituted for the more difficult to find malt extract called for in the recipe) give the loaf a subtle sweetness and depth of flavor. The recipe is very straightforward and makes two loaves. You can find it here at this week’s hosts: Veggie Num Nums and The Family that Bakes Together.

It’s a rewarding experience to make bread by hand. The feel of the dough as you knead it into a smooth ball is completely lost once you let a machine do the work for you. I’m not going to give up my bread machine yet (it is awfully convenient!) but I will be making this whole wheat bread by hand again.

The dough shaping procedure used in this recipe was new to me. To shape the dough after the first rise you press the dough into a rectangle 9 inches by 12 inches long:

Starting at the top, the dough is folded about two-thirds of the way down:

and then folded again so that the top edge meets the bottom edge:

The seam is pinched tightly and the ends are folded in and pinched. Not too pretty. I need some practice here!

The loaf is then turned over so the seam is on the bottom. Much better!

The loaf is then put into a buttered pan, covered with plastic wrap, and allowed to rise until it doubles in size again. Before the second rise:

After the second rise:

Last the bread is baked in a 375 degree F. oven for 35 minutes. You let it cool and then slice away!

My whole wheat loaf wasn’t perfect but I like to think that is part of the charm of homemade bread. It was delicious and the perfect partner for some homemade soup I made. I do think my baking skills are improving thanks to the helpful tips and insights from the Tuesdays with Dorie baking group!

Nectarine Upside-Down Chiffon Cake—Tuesdays with Dorie

Tags

, , , , , ,

Nectarine Upside-Down Chiffon Cake

I made this ten-inch lemon chiffon cake with nectarine topping and streusel filling for my family’s Labor Day BBQ. I am trying to get back in sync with my fellow TWD bakers. Summer for my family has been filled with camping trips away from my kitchen. I’ve had my fill of s’mores and I am ready for some serious baking.

You can find the recipe here at this week’s hosts: The Double Trouble Kitchen and The Little French Bakery.

In the cake world, chiffon lives somewhere between batter cakes and foam cakes. Vegetable oil is a key ingredient. While this makes for a very moist cake it is hard to beat air into oil. So a chiffon cake relies on both leavenings like baking powder and baking soda and beating egg whites until stiff and folding them into the cake batter before baking.

Without the richness of butter in the batter like a traditional cake chiffon cakes are well suited to toppings like the caramelized nectarines in this upside-down version. Other fruit like pears, apples, apricots, plums, or bananas can be substituted.

When I made mine I did use light brown sugar instead of dark brown sugar (it was what I already had on hand). I baked it for closer to 60 minutes at 350 degrees F. than the 45-50 minutes called for. I had no problems unmolding it from my 10 inch springform pan. It sunk slightly in the middle but that didn’t really matter in the end. It was baked well throughout and tasted great.

I would consider this a complete TWD baking success for me. I’m looking forward to more fall baking in the weeks ahead!

Do you bake more in the fall/winter too? Are you gearing up for a fall baking spree?

Fruit and Berry Galette—Tuesdays with Dorie

Tags

, , , , ,

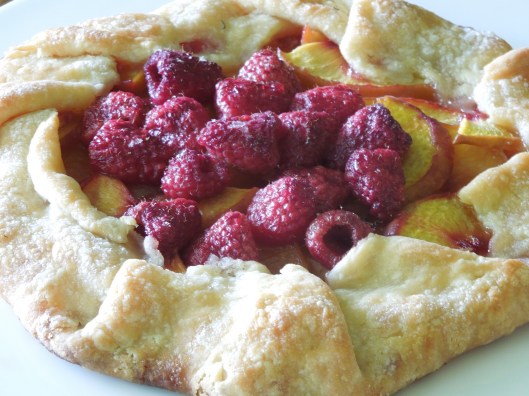
Fruit and Berry Galette

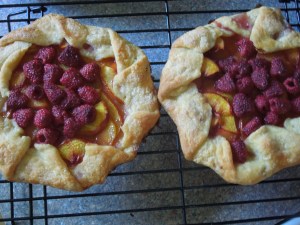
I love this easy crust hugging peaches and raspberries. I made the dough by hand and added some homemade yogurt (a new experiment in my kitchen) and what seems to be a secret ingredient: yellow cornmeal. The result is an easy to handle dough that’s slightly tart and crispy. The recipe makes enough dough for two small galettes and knowing my family’s appetite for dessert I went ahead and made both at once.

No regrets on that. These galettes were delicious.

You can find the recipe here at the hosts: Tomato Thymes in the Kitchen and Garden and The Kitchen Lioness.

After forming the dough into two disks I refrigerated them for about three hours. I decided to go with peaches and raspberries for my filling but you could use any fruit and berries here.

I rolled the chilled dough out into 11-inch circles. It was a little sticky but with some flour under the dough and on my rolling pin I had no troubles. I placed my sliced peaches and raspberries over the dough and left a couple inch border around. Then I sprinkled the filling with both granulated sugar and honey.

The edges of the dough were folded over the filling and the crust brushed lightly with water before more sugar was sprinkled on.

I baked the galettes for about 40 minutes at 400 degrees F. There was a small amount of juice leaking but I think that is part of the charm of these rustic little pies.

I am hanging on to this recipe! My whole family enjoyed them. The peaches were soft and sweet and the raspberries provided a bright tart contrast. I am already thinking about blueberries for the filling. Apple galettes would be perfect for fall. Or maybe pears. Or one of each. I don’t think my family will complain if galettes keep showing up after dinner.

Macaron Class with Chef Mercante

Tags

, , , ,

Macarons prepared by Chef Cecilia Mercante

Sometimes you just have to seek out the “real deal” before you attempt to make it at home. Macarons fit the bill for me. I have tried to make them once at home with little success. I wasn’t exactly sure what the texture should be like inside the cookie. Crispy? Soft? Plus the consistency of my batter was too thin and left my piped macarons spreading across the pan. Not satisfied to accept failure I knew I had to do some research.

So I googled “French Pastry Chef” and found someone in my neck of the woods who is an expert–Chef Cecilia Mercante at the Ann Arbor, Michigan farmer’s market. According to her website, cecilia’s pastries,  Chef Mercante was trained at the Institut National de la Boulangerie Patisserie in Rouen, Normandie France. I thought surely this is as close as I’m going to get to an authentic macaron.

I went to the next farmer’s market and bought several of her macarons. I was wowed by the delicate crust of these cookies followed by a slightly soft, gooey interior and a fresh and flavorful buttercream filling. This is what I had to aim for. Luckily for me Chef Mercante offers classes!

I signed up for a 3 1/2 hour macaron class for amateurs. Friendly and approachable, Chef Mercante and her husband run the classes out of a commercial kitchen attached to their home. I was joined by three other eager students to learn the mystery of the perfect macaron.

Chef Mercante first demonstrates then guides students through a “hands-on” macaron making experience.

First she demonstrated the steps, giving detailed explanations of the chemistry involved with each stage. I learned about the importance of using the best ingredients, the age of the eggs, and what to look for when whipping the egg whites:
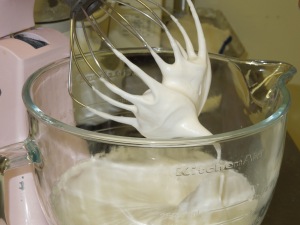
The “bird’s beak” or perfectly whipped egg whites

She demonstrated the proper way to fold in the almond flour mixture into the whipped egg whites and the two clues the macaron batter is ready: shine and the consistency of flowing lava:

Properly folded macaron batter

She also demonstrated how to practice piping the batter without any templates:
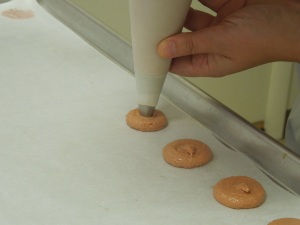
Piping the macarons

Chef Mercante was masterfully knowledgeable yet able to interject lots of laughs to ease our nerves. The class was very “hands-on” and she guided us every step of the way when it was our turn to make a batch.

We also got to watch her develop several flavors of buttercream and use them to fill our macarons:

My first batch of macarons with vanilla buttercream filling

The simplicity of using a whole vanilla bean made the classic vanilla buttercream outstanding. I was also intrigued by some of the more unique variations like using violet liqueur and candied violets to create a violet buttercream.

I learned so much at this macaron class. I can’t wait to try to recreate them at home!

I had a great time and walked away with the feeling that I could recreate these delicate cookies at home with practice. I need to add a few small gadgets to my kitchen like a digital scale to weigh ingredients and some larger pastry bags and tips than I don’t currently have. But once I am set up at home with supplies I will be ready to tackle macarons by myself again! Thank you Chef Mercante!

Have you ever made macarons? What was your experience?

Semolina Bread–Tuesdays with Dorie

Tags

, , , ,

Semolina Bread

This bread was new to me but didn’t disappoint. Semolina bread is an Italian baking classic. It’s chewy and dense. The semolina flour used to make the loaf is milled from durum wheat. That’s the same flour used to make pasta. This loaf is very easy to make but an all day project–the total rising time is about 6 hours.

You can find the recipe here at: The Way to My Family’s Heart and Keep it Luce.

The hardest part for me was finding semolina flour. My regular grocery store didn’t carry it.  I found a bag of Bob’s Red Mill Semolina Flour at a slightly more upscale grocery nearby. Other than that it was a series of fairly easy steps: mix the yeast with some water and flour for the sponge (then rest for 2 hours), make the dough in a food processor (rise for 2 hours), shape the dough (rise for 2 more hours), and then bake for 35 minutes at 400 degrees F.

Other bloggers have complained about the saltiness of this bread so I did reduce the salt slightly than what the recipe called for to 1 1/2 teaspoons. I was not shy with the slashing and used a long serrated knife to make the cuts. After researching semolina bread a little online I decided to use an egg wash and add some sesame seeds to the top. This seems to be the classic presentation.

Semolina bread is a hearty comforting loaf that can compliment just about any meal. That makes it a keeper in my book.

Hazelnut Biscotti—Tuesdays with Dorie

Tags

, , , , ,

Hazelnut Biscotti

This is the easiest most delicious biscotti recipe I have ever prepared. Dangerously so. I can see this becoming a weekly indulgence.

You can find the recipe at this week’s hosts: Homemade and Wholesome and Baking and Boys.

I purchased some chopped hazelnuts at the store and toasted them in a 350 degree oven for 4-5 minutes. Then I stirred the dry ingredients in a bowl: flour, baking soda, and salt. The wet ingredients were stirred in another bowl: eggs, liqueur (I used rum because I didn’t have any Frangelico), vanilla, and sugar. The dry ingredients are added to the wet and mixed with a wooden spoon. Last the toasted nuts are added just until combined.

This very sticky dough is formed into two logs about 12 inches long each. I baked the logs for exactly 35 minutes at 300 degrees F.

After cooling for a bit, I cut the logs into 1/2 inch slices. I baked them a second time on a cooling rack for about 11 minutes at 300 degrees F. This is a neat trick that keeps air circulating around the whole cookie without having to flip them over.

For a finishing touch I melted 3 ounces of semi-sweet chocolate chips with 1/2 teaspoon of shortening in the microwave. I used a fork to drizzle the melted chocolate over the biscotti.

The verdict is that these biscotti are FABULOUS. Gobbled right up. I am already thinking about making another batch tomorrow. The add-ins seem endless. You can use any nut you like. Dried fruit seems to be a must try. Different liqueurs. More chocolate. These are so good and so easy! Perfectly crunchy and calling out to be dipped in a cup of tea.

Strawberry Round-Up: Easy Jam, Icebox Pie, and Fresh Ice Cream

Tags

, , , , ,

Easy Strawberry Jam

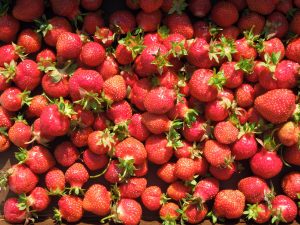
I will admit it. At this point I have had my fill of strawberries. I walk right by them in the grocery store and don’t buy any. After picking twelve pounds at my local strawberry farm and using them in everything I am done with strawberries for a bit.

This is after I enjoyed this easy strawberry jam, icebox pie, and fresh strawberry ice cream.

The jam seems to be foolproof. I found this recipe for Easy Strawberry Jam from Ina Garten at the Food Network. I have never canned anything before. The whole process intimidates me. So this jam that comes together quickly and lasts for a few weeks in the fridge was right up my alley. I’ve enjoyed it simply with my morning toast while imagining that I am with Ina hanging out in the Hamptons. A girl can dream.

You clean and quarter the berries, and toss them with sugar and orange-flavored liqueur in a Dutch oven (I did not splurge on the Grand Marnier. Did that make a difference? I doubt it). This mixture is brought to a boil. A few blueberries and 1/2 of a diced Granny Smith apple is added. Don’t skip the apple! It has the natural pectin you need to thicken this mixture into jam.

I kept this at a rolling boil until the jam reached 220 degrees F. on a candy thermometer, about a half-hour. Last it is cooled and stored covered in the fridge. Easy peasy.

Strawberry Icebox Pie

While not fancy, the strawberry icebox pie is hands down my favorite strawberry creation. You can find the recipe for Strawberry Icebox Pie from Martha Stewart. It has a simple graham cracker crust and fresh tasting strawberry filling.

Two cups of strawberries are combined with some sugar, cranberry juice, cornstarch and salt in a Dutch oven.

These are brought to a boil and cooked for a minute. More sliced strawberries are added (the fact that these are not cooked contributes to the fresh tasting filling) and it is cooled slightly before pouring the filling into the crust and refrigerating until set after a few hours.

After making the fancy pants French strawberry cake I was not in the mood for any elaborate finish for this pie. I really just wanted to eat it! So I grabbed a can of whipped cream and topped it without flair. Not that it mattered. My family was fighting over who could help themselves to seconds and thirds of this one.

Fresh Strawberry Ice Cream

The rest of my strawberry haul went into two batches of this Fresh Strawberry Ice Cream recipe from Cuisinart. I just bought the ice cream maker on sale at a local store. I figured it would be a fun gadget to use with my kids this summer. So I haven’t really had time to venture too far away from the basic recipes yet. Although simple, this fresh strawberry ice cream is definitely a winner! I opted to keep the natural look but you could add some food coloring to achieve a more pink look here.

So that’s what I did with all those strawberries! The worst part is all the slicing and prepping. I have my eye on this little strawberry knife from Kuhn. Do I really need another gadget? Probably not. But if I run across it in a store I won’t be able to resist.

French Strawberry Cake—Tuesdays with Dorie

Tags

, , , ,

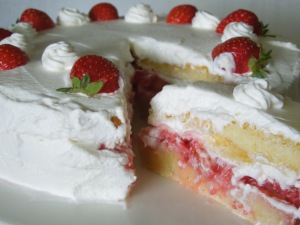
French Strawberry Cake

I chalk up this particular génoise recipe as a learning experience. A very tasty lesson in the art of mixing up and folding a fussy sponge cake.

You can find the recipe here at this week’s hosts: Sophia’s Sweets and Think, Love, Sleep, Dine.

A génoise is a whole egg sponge cake that uses air suspended in the batter to give volume to the cake. So no leavening agents are used like baking powder. It’s dry and often soaked in syrups or liqueurs. Génoise is a classic and the foundation of much French patisserie. For a fledgling baker like myself it’s tricky. Very, very tricky.

I watched this video with Julia Child and Flo Braker making a génoise several times before I even began the process. I tried to follow their steps closely. This was my first mistake. I am neither Julia Child nor Flo Braker.

The basic procedure for this recipe is to take 4 room temperature eggs (in a more classic génoise you would heat them) and combine them with sugar and whip it in your stand mixer until it is tripled in volume. You want it to be able to lift the whisk and have the mixture fall back into the bowl in a ribbon that rests on the surface about 10 seconds. This is known as the “ribbon stage.” THIS IS IMPORTANT! If you don’t properly mix in enough air here your finished cake will not have the height you want. I thought I accomplished this but looking back I think I would have mixed mine even longer and maybe at a higher speed.

The next step (eek! I’m nervous just thinking about it) is to fold in some sifted cake flour with a small amount of sugar and salt in three additions. I followed the Julia video from above and just kind of dumped in each of these flour additions. This was a mistake on my part! I have since talked to my helpful TWD bloggers and learned I should have instead SIFTED the flour over the beaten eggs. Dumping it in caused it to sink to the bottom (making it hard to fold in and deflating my whipped eggs) which was one of the reasons my génoise was less than perfect. I should also mention that my husband called me from a fishing trip while I was folding the flour in. I gave him an earful later for picking this moment to tell me he was having a great time.

The last and most critical moment for this fragile whipped egg batter is mixing 1 cup of the batter with some melted butter then folding this mixture in the whipped eggs and flour. You don’t want to deflate the whipped eggs so you have to delicately mix in the butter to the rest of the batter. The butter should be melted, but not warm.

You pour the batter into a 8-inch pan and use a spatula to smooth it out and slightly raise up the sides. Then bake for around 25-27 minutes in a 350 degrees F. oven.

My cake was only about 1 1/4 inch tall when finished, surely not the height it was supposed to be. I cut it into two layers instead of three. The bottom layer had a slightly doughy texture because the flour sunk to the bottom when I dumped it in and was probably never fully folded in. Next time I will whip like crazy to make sure I achieve the ribbon stage and sift the flour into the whipped eggs instead of dumping it in.

Here’s the best part though: I made the strawberry filling and heavy cream icing, filled and decorated my génoise and served it to my family. And it was delicious!! Not ready for a French Patisserie. . .but a fantastic dessert nonetheless.

Making it even more special was the fact that we had just returned from a local strawberry U-Pick farm with a large haul of strawberries.

I used some of them for the filling and decoration. Freshly picked strawberries are the best! They helped cover up any small flaws my cake had.

My family at the strawberry farm.

I am already thinking about the next time I attempt this recipe and have found comfort in this post by Rose Levy Beranbaum on her recent failed génoise.

If you have any additional génoise tips please share them with me!

Almost Famous Strawberry Lemonade

Tags

, , ,

Almost Famous Strawberry Lemonade

My family went to a local U-Pick strawberry farm last weekend and I have been churning out strawberry recipes for days. So for June I will write about all things strawberry! I’ll start with this spot-on copycat recipe for Red Robin Restaurant’s Freckled Lemonade.

You can find this recipe in the May 2012 issue of Food Network Magazine or at the Food Network website. According to Food Network Magazine, Red Robin serves up 420,000 gallons of this drink each year. It’s very lemony, super sweet, and topped with strawberries. My family loves it!

First you make two syrups: lemon and strawberry. You make the lemonade by combining lemon juice with the lemon syrup, salt, and cold water. I recommend doubling the amount of water used. It will still be very sweet. To make individual drinks you put a tablespoon of the strawberry syrup in a glass. Fill the glass with ice, top with the lemonade, and a spoonful of strawberries.

Here we are with twelve pounds of red, ripe strawberries! Only two cups went into this lemonade recipe. Soon I will post about our other creations including cake, pie, jam, and ice cream!

Do you have a favorite recipe for strawberries? Let me know!